Home Blog Page 2

EQ Ear Training for Audio Engineers: Jazz Bass With 9dB Boost

In this EQ Ear Training for audio engineers, we will be listening to how a 9dB boost at different frequencies affects the sound of a Jazz Bass.

For this listening exercise, we will be applying +9dB boost to a Jazz Bass. This is a chance to better understand the effect that EQ has on the sound of a Jazz Bass.

What is a Jazz Bass?

EQ Ear Training: Effects of 9dB Boost on a Jazz Bass

Let’s start with a quick explanation of what is a Jazz Bass?

The Fender Jazz Bass, often simply referred to as a Jazz Bass or J Bass, is a model of bass created by Fender Musical Instrument Corporation in 1960.

It has two single-coil pickups, one near the neck of the instrument and the other near the bridge. This makes it capable of producing a wide range of tonal options, from deep and warm to bright and snappy.

In common usage, the term Jazz Bass is used to refer to any instrument made by any manufacturer in this style.

EQ Ear Training: Effects of 9dB Boost on a Jazz Bass

For this EQ Ear Training video, we will be applying a 9dB boost to the sound of a Jazz Bass at different intervals. Listen along through a set of headphones to hear how the EQ changes the characteristic of the bass. This is how EQ can be used to shape the sound of the bass.

Here are some notes on the video as you listen along. We start off with a listen through of the original bass track without any EQ. After that, there will be a 9dB boost with a Q of 3.2 applied at regular intervals.

Listening Notes

Effect of boosts at

  • 63Hz: Increases the weight of the low end.
  • 125Hz: More defined body.
  • 250Hz: Woofy-ness, slightly boxy.
  • 500Hz: Boxy and brings out the honkiness of the bass.
  • 1kHz: Enhances the mids and nasal qualities of the bass.
  • 2kHz: Brings out the high end and clarity of the bass.
  • 4kHz: Emphasises the string noise of the bass. Starts to bring out the sound of the noise floor.
  • 8kHz: Slight zing to the bass’s top end. However, there is very little in terms of frequency content to enhance there.
  • 16kHz: Little audible impact of the boost.

We hope that the listening notes help you as you listen along to the video and give you a better way to relate EQ to the impact it can have on the sound of an instrument.

Each instrument is different but you can use the above as a guide when you need to make decisions about EQ.

If you liked this video, you may also wish to listen to this other one on ear training with a 9dB cut to the Jazz bass sound.

Mastering Mixer EQ Settings for Vocals: A Guide

0

When it comes to producing high-quality vocal tracks, in some settings, all you have is your mixer EQ. Still, knowing how to maximize your mixer EQ settings and the proper EQ techniques have the potential to vastly improve the clarity, tone, and impact of vocal tracks. In this guide, we’ll explore the ins and outs of using mixer EQ settings for vocals and provide practical tips and techniques to help you achieve better sounding vocal mixes.

Key Takeaways

  • Optimizing mixer EQ settings is essential for producing high-quality vocal tracks.
  • Proper EQ techniques can greatly improve vocal clarity, tone, and impact.
  • This guide will provide practical tips and techniques to help you achieve professional-quality vocal mixes.

Assessing What To Do For Vocal EQ

When it comes to mixing vocals, EQ is a crucial tool for achieving the desired sound. You will need to bear two things in mind:

  • The type of vocals that you are working with, in other words, whether it is a male or female voice, and which frequency range they occupy.
  • The type of EQ that you have available to work with on the mixer.

Understanding the Human Voice

Understanding the Human Voice

Before we dive into how to EQ the voice using a mixer, we should try to understand a bit more about the human voice and its frequency range.

Classifying the Vocal Range

The human vocal range is typically divided into distinct vocal registers, each encompassing a specific frequency span. These registers are:

Bass (E2 to E4 / around 82 Hz to 330 Hz): The bass register emanates deep and resonant tones. Bass singers possess voices vibrating within lower frequency brackets, captivating audiences with their robust and authoritative vocal quality.

Baritone (G2 to G4 / around 98 Hz to 350 Hz): Baritone voices bridge the gap between bass and tenor ranges. Their mellifluous and rounded tones make them versatile performers across various musical genres.

Tenor (C3 to C5 / 123 Hz to 440 Hz):  The tenor range is known for its higher frequencies and the ability to reach high notes. Tenors often take center stage in vocal ensembles, infusing performances with emotional depth and captivating highs.

Alto (F3 to F5 / 175 Hz to 659 Hz): Altos, also called contraltos, occupy a comfortable mid-frequency zone. They inject richness and texture into choral harmonies and frequently shine in solo and group presentations.

Soprano (B3 to C6 / 262 Hz to 1047 Hz): Sopranos claim the highest vocal range, producing clear tones that effortlessly cut through musical arrangements.

EQs found on Mixers

Mixer EQ Settings for Vocals

The first step in achieving great vocal EQ using your mixer is to understand the EQ that you have at your disposal.

To start off, we assume that you are working with an analog mixer and that you are using the EQ that is built in to the mixer. This is also known as an onboard EQ.

EQ on Analog Mixers

Most analog mixers have multiple bands of EQ, typically ranging from 2 to 10 bands. These are part of the channel strip.

The most common configuration is a 3-band EQ, with controls for low, mid, and high frequencies.

Each EQ has a center frequency, which determines the frequency range that band will affect. There is also a control for boosting or cutting that band’s frequency range.

The low EQ control on an analog mixer is responsible for manipulating the low-frequency content of the audio signal. This control allows you to boost or cut the bass frequencies, typically ranging from around 20 Hz to 250 Hz.

The midrange EQ control on an analog mixer governs the frequencies that fall in the middle of the frequency spectrum, roughly between 250 Hz and 4000 Hz. This range is where a significant portion of the audio information resides, including the presence and character of vocals.

The highs EQ control manages the higher frequencies, typically spanning from around 4 kHz to 20 kHz. These frequencies contribute to the brightness, clarity, and detail of the audio.

For the exact frequency that the mixer EQ has been tuned to, you will need to refer to your mixer manufacturer’s manual.

High Pass Filter

A High Pass Filter is a special type of EQ found on mixers that allow you to boost or cut all the frequencies below a certain frequency.

This is normally used to remove unwanted low frequencies.

EQ on Digital Mixers

If you are using a digital mixer, it is likely that you will have a parametric EQ at your disposal.

This type of EQ allows you to control the center frequency that you wish to adjust as well as how much to boost and cut this frequency.

Key Frequency Ranges for Vocal EQ

Next, when it comes to achieving the best EQ settings for vocals in a mix, it’s essential to consider the key frequency ranges that affect the vocal sound. By targeting these frequency ranges, you can enhance vocal clarity and balance, resulting in a richer and more impactful vocal mix.

Here’s a helpful vocal EQ frequency chart to guide you on which frequencies to target:

Frequency Range Quality / Effect
100 Hz – 250 Hz Impact and warmth
500 Hz – 1 kHz Punchiness and presence
1 kHz – 4 kHz Clarity and brightness
4 kHz – 6 kHz Pronunciation and intelligibility
6 kHz – 8 kHz Sibilance and harshness


As you can see from the chart, each frequency range has a specific effect on vocal sound. Understanding how to identify and address common issues in each range can help you achieve the best EQ settings for vocals in a mix.

What this means is that if you find the the vocal lacks in any quality or effect, you should focus in on the corresponding frequency range and make adjustments to those frequencies using your available mixer EQ.

For example, if you find that a vocal lacks warmth and body, it means the frequencies between 100 Hz to 250 Hz are not prominent enough.

To make those frequencies more prominent, you can choose to use the mixer EQ to give the 100 Hz to 250 Hz range a boost, so that it will stand out from all the other frequencies.

Alternatively, to make that frequency range more prominent, you can lower or cut the other frequencies.

Or, if your vocals are lacking warmth and impact, boosting the 100 Hz – 250 Hz range can help. If vocals are lacking presence and punch, try boosting the 500 Hz – 1 kHz range. If vocals sound muddy or cluttered, cutting the 200 Hz – 500 Hz range can help cleanup the mix.

Keep in mind that these frequency ranges are not strict rules, and should be used as a starting point for EQ adjustments. Every vocal track is unique and may require different adjustments to achieve the best sound.

Troubleshooting Common Vocal EQ Issues

While optimizing vocal EQ can greatly enhance the quality and impact of vocal tracks, it can also pose certain challenges. Here are some common vocal EQ issues that may arise during the mixing process and some tips and techniques to help overcome them:

Issue Troubleshooting Tip
Muddiness in Vocals Reduce the low-mid frequencies to remove mud and enhance clarity. If necessary, use a high-pass filter to remove unwanted low-end rumble.
Unintelligibility in speech Try to give the 2 kHz to 4 kHz frequencies a slight boost to help bring out the consonants in the words. This will usually help with increasing the intelligibility.
Harshness in Vocals Reduce the high-mid and high frequencies to soften harsh sounding vocals. Alternatively, use a de-harsher plugin to specifically target and reduce harsh frequencies.


When troubleshooting vocal EQ issues, it’s important to start by making subtle adjustments. Small changes can make a big difference and can help you achieve a professional-quality vocal mix.

  • Trust your ears and make subtle adjustments
  • Reduce low-mid frequencies to remove muddiness
  • Reduce high-mid and high frequencies to reduce harshness

By being aware of common vocal EQ issues and having the necessary tools and techniques to address them, you can achieve a clean, polished vocal mix that enhances the overall quality of your music.

Quick EQ Cheats for Vocals

To oversimplify things, here are two quick settings that you can try for male and female vocals. Use this as a starting point to adjust for the voice that you are working with.

Male vocals

  • Boost the lows by +3dB
  • Cut the mids by -3dB
  • Boost the highs by +3dB

This setting will give the male voice more body while also increasing the clarity.

Female vocals

  • Cut the lows by -3dB
  • Leave the mids unchanged
  • Boost the highs by +3dB

This setting will give the female voice increased clarity and accentuate the voice’s individual character.

Some Additional Vocal EQ Tips Rules of Thumb

With the right vocal EQ settings for mixer, you can enhance the clarity, warmth, and overall quality of a vocal track. Here are some vocal EQ tips to bear in mind when you are working with vocals.

1. One of the most important vocal EQ tips is to start by cutting frequencies, rather than boosting them. This can help reduce any unwanted frequencies and create more space in the mix for the vocals. What this means is that, if you wish for a vocal to have greater clarity, instead of immediately boosting the high frequencies, you can try cutting the low frequencies instead. What this does is to clear away the low frequencies so that high frequencies are more prominent.

2. Be careful not to overuse EQ, as too much can lead to an unnatural sound when it been overly processed.

3. Another useful vocal EQ technique is to use a high-pass filter to remove low-frequency rumble or noise from the vocal track. To do this, simply set the high-pass filter to a frequency slightly lower than the lowest frequency present in the vocal track.

Conclusion

Mastering mixer EQ settings for vocals is a crucial skill for any aspiring audio engineer. By understanding the basics of vocal EQ, setting up the mixer for optimal sound, and targeting key frequency ranges, you can greatly enhance the clarity, tone, and impact of your vocal tracks.

Remember, the key to mastering mixer EQ settings for vocals is practice and experimentation. Apply the techniques and tips covered in this guide, and don’t be afraid to try new approaches. With persistence and dedication, you can achieve outstanding results and elevate your vocal mixes to the next level.

So, whether you’re mixing vocals for live performance or recorded tracks, remember to focus on the mixer EQ settings for vocals, and make the most of this powerful tool to create the best possible sound.

FAQ

Q: How important are mixer EQ settings for vocals?

A: Mixer EQ settings for vocals are crucial for optimizing the clarity, tone, and impact of vocal tracks. Proper EQ techniques can greatly enhance the overall quality and presence of vocals in a mix.

Q: What are some basic vocal EQ tips and techniques?

A: When EQing vocals, it’s important to consider the role of EQ in shaping the sound. Some tips and techniques include cutting frequencies that muddy up the vocals, boosting presence and clarity, and adjusting the low-end for a balanced sound.

Q: What are the key frequency ranges for vocal EQ?

A: Understanding the key frequency ranges for vocal EQ is essential. By referring to a vocal EQ frequency chart, you can identify and address issues in specific frequency ranges to achieve desired vocal clarity and tonal balance in a mix.

What Does an Audio Compressor Do? Unlocking the Secrets

0

Welcome to our guide on audio compression! As avid audio engineers, we understand the importance of achieving optimal sound quality. In this article, we will explore the role of an audio compressor in audio engineering and production. We will explain what audio compression does, how it affects the dynamics of sound, and how it can improve overall audio quality.

Whether you’re a seasoned pro or a newbie to audio engineering, understanding audio compression is crucial in achieving a polished and professional sound. So, let’s dive in and unlock the secrets of audio compression!

Key Takeaways

  • An audio compressor is a tool used in audio engineering to control the dynamic range of sound.
  • Audio compression affects the loud and soft parts of sound, evening out inconsistent volume levels and preventing distortion.

Understanding Audio Compression

In the previous section, we discussed what an audio compressor does and its importance in audio engineering. In this section, we will take a closer look at the concept of audio compression and how it works.

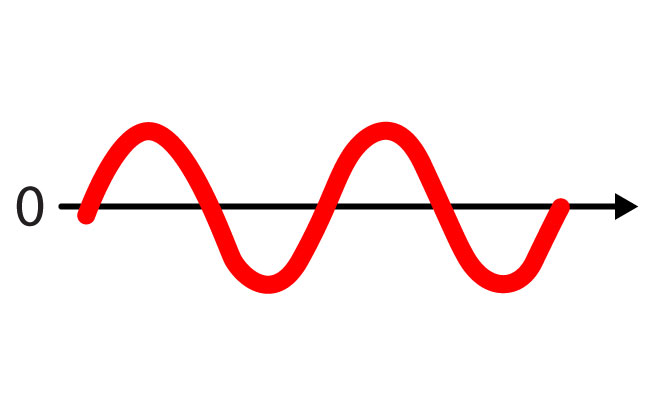
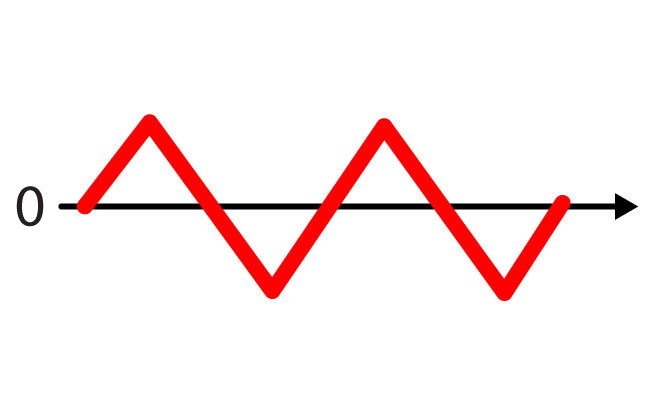
Audio compression refers to the process of reducing the dynamic range of an audio signal. Dynamic range is the difference between the loudest and softest parts of a sound. Compression helps to control the dynamic range by reducing the volume of the loudest parts of the sound and amplifying the softest parts, resulting in a more even overall volume.

audio compression

The goal of audio compression is to achieve a consistent volume level throughout the audio signal. It can also help to prevent distortion or clipping, which can occur when the volume level exceeds the maximum level that a system can handle.

This involves a two step process. Firstly, it lowers any peaks that exceed a determined threshold and then it raises up the overall gain for the signal.

To achieve these results, an audio compressor applies a series of parameters to the audio signal. These include:

Parameter Function
Threshold The level at which the compressor begins to reduce the volume of the signal.
Ratio The degree to which the compressor reduces the volume above the threshold.
Attack The time it takes for the compressor to start reducing the volume once the threshold is reached.
Release The time it takes for the compressor to stop reducing the volume once the threshold is no longer exceeded.
Gain The level at which the output signal is boosted after compression.


By adjusting these parameters, an audio engineer can tailor the compression to the specific needs of the audio signal and create a more balanced and controlled sound.

Next, we will explore the broader role of an audio compressor in the field of audio processing.

The Role of an Audio Compressor in Audio Processing

As we have seen in previous sections, an audio compressor plays a critical role in controlling the dynamics of sound. However, its usage extends far beyond this basic principle, making it an essential tool in the field of audio processing. In this section, we will explore the various stages of audio production where an audio compressor is widely used.

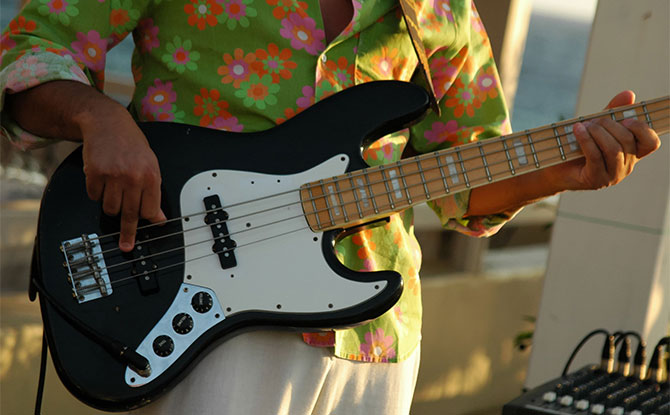
The first stage where an audio compressor finds its application is in the recording process. When recording music, vocals, or any other sound source, variations in loudness can occur due to the performer’s technique or the particular instrument being played. An audio compressor can help to even out these inconsistencies, allowing for a more consistent recording.

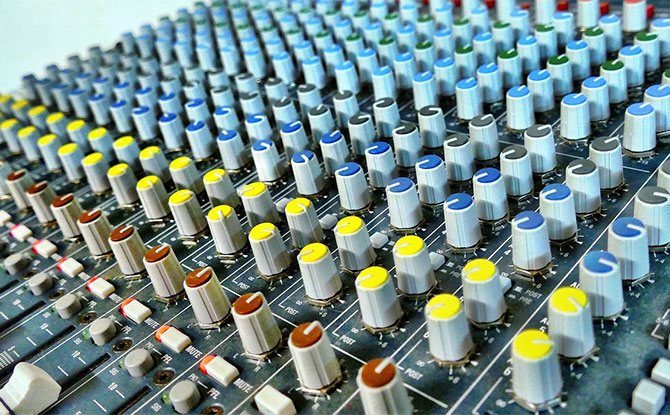
Once the recording is completed, the next phase is mixing, where the various recorded tracks are combined into a single, coherent mix. Here again, an audio compressor is an invaluable tool. It can be used to tame rogue peaks and ensure that all of the elements of the mix are well-balanced and sit together harmoniously.

The final stage of audio processing is mastering. This is the process of finalizing the mix, ensuring that it is optimized for playback across all types of devices and listening environments. At this stage, an audio compressor is used to further refine the dynamics of the mix. It can help to create a cohesive sound that is consistent throughout the track and maximize the perceived loudness of the audio while avoiding distortion or excessive noise.

Overall, an audio compressor is a vital tool in the field of audio processing, and its usage extends across the entire audio production chain. From recording to mastering, understanding how to use an audio compressor effectively is essential for achieving professional and polished sound quality.

audio compressor in action

Controlling Audio Levels with an Audio Compressor

When it comes to audio engineering, controlling audio levels is key to achieving high-quality sound. An audio compressor is an essential tool that helps to regulate the volume of audio signals and maintain a consistent level throughout a recording or a live performance.

By compressing the dynamic range (the difference between the quietest and loudest parts of a track), an audio compressor can even out volume inconsistencies and prevent distortion or clipping. This makes sure that every part of the track can be heard clearly, without any sudden spikes that could damage speakers or cause discomfort to the listener.

audio compressor in use

There are a few things to keep in mind when using an audio compressor to control audio levels. The threshold determines the volume level at which the compressor starts to kick in. The ratio determines the degree of compression applied once the threshold is crossed. The attack and release settings control how quickly the compressor reacts to changes in volume, while the makeup gain is used to compensate for any volume loss due to compression.

It’s important to strike a balance between maintaining a consistent volume level and preserving the natural dynamics of the audio signal. Overcompression can result in a flat, lifeless sound, while improper ratio settings can cause pumping or breathing artifacts that are distracting to the listener.

With proper compression techniques, an audio compressor can be a powerful tool for controlling audio levels and achieving optimal sound quality.

Different Types of Audio Compressors

Now that we understand the concept of audio compression and its role in audio processing, let’s take a closer look at the different types of audio compressors available. Understanding the differences between various compressor types is important for achieving the desired sound quality in your audio engineering projects.

One of the primary distinctions between compressors is whether they are analog or digital. Analog compressors use analog circuits and components to process audio signals, while digital compressors use software algorithms to achieve compression.

Analog compressors are known for their warmth and character, and are often used in recording studios for their vintage or classic sound. They work by modifying the voltage of the audio signal, which affects its amplitude and creates compression. Some popular analog compressors include the SSL G Series, Teletronix LA-2A, and the Fairchild 670.

Digital compressors, on the other hand, offer more precise control over the compression process. They can often achieve a very transparent, clean sound. Many DAWs (Digital Audio Workstations) come with built-in digital compressors, such as the Waves SSL G-Master Buss Compressor, FabFilter Pro-C 2, or Universal Audio LA-2A plug-in.

Another way to categorize compressors is by their basic design. There are several compressor types that are commonly used in audio engineering:

Type Description
VCA (Voltage Controlled Amplifier) Uses a voltage-controlled amplifier to modify the gain of the audio signal.
Optical Uses a light source and photocell to adjust gain; often used for its smooth, musical sound.
FET (Field Effect Transistor) Similar to VCA compressors but uses a FET transistor instead of a voltage-controlled amplifier.
Tube Uses vacuum tubes to process the audio signal; often used for its warmth and vintage, analog sound.
Multi-band Divides the audio signal into separate frequency bands and applies compression to each band individually, allowing for more precise control over the sound.


Different Types of Audio Compressors

When selecting an audio compressor, it is important to consider the specific needs of the project and the desired sonic outcome. Each compressor type and model has its own strengths and weaknesses, and can be used to achieve different effects. Experimentation and experience are key to finding the right compressor for the job.

Setting Up an Audio Compressor for Optimal Performance

When it comes to setting up an audio compressor, there are several parameters that need to be considered.

It’s important to note that the optimal settings for these parameters will vary depending on the source material and the desired effect.

However, as a general rule, a slower attack time can be used to allow transients to come through, while a faster release time can help to avoid pumping and breathing artifacts.

It’s also worth considering the use of makeup gain, which can be used to compensate for the overall reduction in level caused by the compressor. However, it’s important to avoid excessive use of makeup gain, as this can lead to a distorted or unnatural sound.

Ultimately, the key to setting up an audio compressor for optimal performance is to experiment with different parameters and settings until the desired effect is achieved. Remember, there’s no one-size-fits-all approach to compression, so it’s important to take the time to find the settings that work best for your specific project.

audio compressor setup

Experimenting with different settings is the key to finding the optimal compression for your audio project.

Audio Compression Techniques for Enhancing Sound Quality

While basic compression techniques can help to control dynamic range and even out audio levels, advanced compression techniques can be employed to achieve more nuanced results.

These techniques include parallel compression, sidechain compression, and multiband compression.

Parallel compression involves blending a heavily compressed signal with an uncompressed signal to create a balance between the two. This technique is useful for achieving a thicker, more present sound without sacrificing dynamic range.

Technique Description
Sidechain compression Uses an external signal source to trigger compression on the main audio signal. This technique is often used to create a rhythmic pumping effect and to give space to other elements in the mix.
Multiband compression Used to compress specific frequency bands, rather than the entire signal. This technique is useful for addressing specific balance issues and ensuring that certain frequency ranges don’t overpower others.


While these advanced techniques can be powerful tools, they should be used judiciously and with a clear understanding of their intended effect. Overuse of compression can lead to a loss of dynamics and an overall reduction in sound quality.

audio compression techniques

Common Mistakes to Avoid When Using an Audio Compressor

Using an audio compressor can be a tricky task, even for experienced audio engineers. There are several common mistakes to avoid to ensure that your compressed sound is optimal and not compromised.

Overcompression: One of the most common mistakes is to overcompress the audio signal. This is when the dynamic range is reduced too much, resulting in a compressed and lifeless sound. To avoid this, be careful with the ratio setting and ensure that the sound remains natural and dynamic.

Improper ratio settings: Another mistake is to use improper ratios. For example, using a high ratio like 20:1 can result in excessive compression, which can be detrimental to the audio quality. It’s important to use the ratio setting creatively and adjust it according to the dynamic range of the sound.

Excessive use of makeup gain: Using too much makeup gain can lead to distortion and clipping, even when the audio signal is not overcompressed. It’s important to monitor the output level and adjust the gain in moderation.

By avoiding these common mistakes, you can achieve optimal sound quality with your audio compressor.

audio compressor mistakes

“It’s important to use the ratio setting creatively and adjust it according to the dynamic range of the sound.”

The Impact of Audio Compression on Different Musical Genres

Audio compression is a crucial tool in modern audio engineering, and it is widely used in various musical genres to enhance sound quality and create a distinct artistic style. The impact of audio compression on different genres can be seen in the unique characteristics and qualities that each genre exhibits.

In genres such as electronic dance music (EDM) and hip-hop, audio compression is often used to increase the perceived loudness and impact of the music. This creates a more energetic and dynamic sound that is well-suited for these high-energy genres. In contrast, genres such as classical and jazz often use compression techniques to control the dynamic range and create a more balanced and nuanced sound.

Some genres, such as rock and pop, use compression in more subtle ways, to even out inconsistencies in volume levels and prevent distortion or clipping. This can create a smoother and more polished sound that is well-suited for radio play or commercial use.

Regardless of the genre, the key to using audio compression effectively is to understand the unique requirements and characteristics of each style of music and tailor the compression techniques accordingly. This requires a deep knowledge of the specific elements that make each genre unique, such as instrumentation, arrangement, and mixing style.

Audio Compression

With the rise of streaming services and the increasing importance of digital distribution, the impact of audio compression on different genres is more significant than ever. As such, it is essential for audio engineers and music producers to have a solid understanding of compression techniques and how to use them effectively to achieve optimal sound quality.

The Future of Audio Compression

As technology continues to evolve, so do the methods and tools used in audio processing. The future of audio compression looks promising with the emergence of new techniques and technologies that aim to improve upon traditional methods.

One area of advancement is in the use of artificial intelligence and machine learning algorithms for audio processing. These technologies can be used to analyze audio tracks and dynamically adjust compression parameters in real-time, resulting in more precise and effective compression.

Another promising area is the use of spatial audio compression, which takes into account the positioning of sound sources in a 3D space. This allows for more accurate and natural-sounding compression, particularly in immersive audio formats like virtual reality.

Finally, there is a growing trend towards implementing more transparent and subtle forms of compression, as opposed to heavy-handed techniques that can result in unnatural and overprocessed sounds. This shift is likely to continue as audio professionals aim for maximum fidelity and authenticity in their productions.

As technology continues to advance, we can expect to see even more sophisticated and effective methods for achieving optimal sound quality in audio production.

audio compression future

Conclusion

In this comprehensive article, we have unlocked the secrets of audio compression and explored its essential role in audio engineering. We have discovered how compression helps to control dynamic range and maintain a balanced sound, and how it is used across the various stages of audio production.

We have examined the different types of audio compressors available and provided practical tips on how to set them up for optimal performance. We have also explored advanced compression techniques and discussed common mistakes to avoid.

Looking to the future, we have discussed emerging trends and technologies in audio compression and how they may impact the field. And lastly, we have examined the specific requirements and characteristics of different musical genres and how compression techniques can be tailored to their unique needs.

By understanding and utilizing audio compression effectively, we can achieve optimal sound quality in our audio productions. So let’s continue to explore and experiment with this powerful tool to unlock the full potential of our sound.

FAQ

Q: What does an audio compressor do?

A: An audio compressor is a device or software that helps control the dynamic range of audio signals. It reduces the difference between the loudest and softest parts of a sound, resulting in a more balanced and consistent audio output.

Q: How does audio compression work?

A: Audio compression works by automatically adjusting the level of a signal based on certain parameters. When the signal exceeds a specified threshold, the compressor reduces its volume by a predetermined ratio. This helps to prevent peaks and excessive volume fluctuations.

Q: What is the role of an audio compressor in audio processing?

A: An audio compressor plays a crucial role in various stages of audio processing, including recording, mixing, and mastering. It helps to control audio levels, enhance sound quality, and ensure a more professional and polished audio output.

Q: How does an audio compressor control audio levels?

A: An audio compressor controls audio levels by reducing the volume of signals that exceed a certain threshold. This helps to prevent distortion, clipping, and inconsistent volume levels, resulting in a more pleasing and balanced sound.

Q: What are the different types of audio compressors?

A: There are various types of audio compressors, including analog and digital compressors. They differ in terms of their circuitry, sound characteristics, and control options. Some popular compressor models include the SSL G Series, Universal Audio LA-2A, and Waves API 2500.

Q: How do I set up an audio compressor for optimal performance?

A: To set up an audio compressor for optimal performance, you need to adjust parameters such as threshold, ratio, attack, release, and gain. These settings can vary depending on the audio source and desired outcome. Experimentation and careful listening are key to achieving the best results.

Q: What are some advanced audio compression techniques?

A: Advanced audio compression techniques include parallel compression, sidechain compression, and multiband compression. These techniques offer more precise control over different frequency ranges and can be used to enhance specific elements of a sound.

Q: What are some common mistakes to avoid when using an audio compressor?

A: Common mistakes to avoid when using an audio compressor include overcompression, improper ratio settings, and excessive use of makeup gain. It’s important to strike a balance and use compression sparingly and purposefully to avoid negative effects on the audio quality.

Q: How does audio compression impact different musical genres?

A: Audio compression is utilized differently across various musical genres based on their specific requirements and characteristics. Different genres may require different compression techniques to preserve the dynamics or achieve a more compressed and upfront sound.

What is Gain in Audio Mixer & How To Set It?

0

I often receive questions about gain in an audio mixer. Gain is a crucial aspect of achieving optimal sound quality, yet many people are unsure of what it is and how to properly set it.

In this section, I will provide a comprehensive explanation of gain in an audio mixer and offer a step-by-step tutorial on how to set it correctly. By the end of this section, you will have a clear understanding of how gain functions in an audio mixer and be equipped with practical knowledge on how to adjust it for optimal audio production.

Key Takeaways:

  • Gain is a crucial aspect of audio production and plays a significant role in achieving optimal sound quality.
  • Properly setting the gain in an audio mixer is essential for producing clear, balanced, and distortion-free audio.
  • There are several gain controls available in an audio mixer, and each has a specific function that impacts the overall sound quality of the audio output.
  • Adjusting gain in an audio mixer requires a careful balance between boosting the input signal and avoiding distortion or noise.
  • Having a clear understanding of gain in an audio mixer is essential for achieving professional-quality audio output.

Understanding Gain in Audio Mixer

Before we dive into how to properly set the gain in an audio mixer, let’s first understand what gain is and why it’s important in achieving optimal sound quality.

Put simply, gain refers to the amount of amplification applied to an audio signal before it reaches a mixer or other recording device.

The purpose of gain is twofold:

  1. To ensure the audio signal is strong enough to be captured by the device without being distorted or lost in background noise.
  2. To provide enough headroom for adjustments in volume or EQ during the mixing and mastering process.

Having the proper gain level can make all the difference in the final sound quality of your recording.

Understanding Gain in Audio Mixer

Importance of Gain in Audio Mixer

Setting the gain correctly in an audio mixer is crucial for achieving high-quality sound. When the gain is set too low, the audio signal may become too weak, resulting in poor sound quality. Conversely, if the gain is set too high, the audio signal may become distorted or clipped, which can be harsh on the ears and ruin the entire recording.

Properly setting the gain in an audio mixer is especially important when dealing with dynamic sounds, such as vocals or percussion instruments. These sounds have a broad dynamic range, meaning they can range from very quiet to very loud. A well-set gain will ensure that the quieter parts of the recording are audible and the louder parts are not distorted.

Additionally, setting the gain correctly can help prevent noise and interference from being amplified along with the audio signal. This can be especially important in live performances or recordings, where unwanted noise can be distracting and diminish the overall quality of the production.

Overall, the importance of setting the gain in an audio mixer cannot be overstated. It is a fundamental step in achieving optimal sound quality and should not be overlooked.

importance of gain in audio mixer

Audio Mixer Gain Control

One of the most important aspects of achieving optimal sound quality in audio production is setting the gain in an audio mixer correctly. To do this, you need to understand the different types of gain controls that are available and how to adjust them to achieve the desired result.

There are several types of gain controls found in audio mixers, including preamp gain, channel gain, and master gain. Preamp gain controls the signal level before it enters the mixing process, while channel gain adjusts the individual levels of each channel. Master gain controls the overall level of the final output.

When adjusting gain in an audio mixer, it is important to keep in mind the relationship between gain and volume. Increasing the gain can result in a louder sound output, but if the gain is set too high, it can lead to distortion or clipping. On the other hand, setting the gain too low can result in a weak or low-quality sound output.

It is important to use your ears when setting the gain in an audio mixer, rather than relying solely on visual indicators. Listen for any distortion or clipping and adjust the gain accordingly to achieve optimal sound quality.

Overall, understanding the different types of gain controls available in an audio mixer and how to adjust them properly is crucial for achieving optimal sound quality in audio production.

How to Adjust Gain in Audio Mixer

Adjusting the gain in an audio mixer is crucial to achieving optimal sound quality. Follow these simple steps to adjust the gain:

  1. Make sure all levels on the mixer are set to zero
  2. Play a sound through the desired channel
  3. Gradually increase the gain until the desired level of volume is reached. You can use the Volume Unit (VU) meters to determine this. On an analog mixer, you should raise the gain so that the incoming signal is at the 0 level. With digital mixers, the incoming signal should be raised up to -12 to 18 dB, depending on the mixer.
  4. Be mindful of distortion – if the sound starts to clip, reduce the gain slightly

It’s important to remember that the gain should be set to the lowest possible level that still achieves the desired volume. This helps to reduce background noise and distortion, resulting in clean and clear sound.

It’s also recommended to periodically check the gain levels throughout your audio production to ensure they remain consistent and properly adjusted.

how to adjust gain in audio mixer

Tip: If you’re adjusting the gain for a live performance, consider practicing before the event to ensure you have a good understanding of how to adjust the gain levels smoothly and efficiently.

Audio Mixer Gain Settings

There are several gain controls in an audio mixer that are responsible for adjusting the sound levels and maintaining the right balance throughout the production process. Here are the main types of gain controls you’ll find in a typical audio mixer:

Gain Control Purpose
Preamp Gain This control adjusts the signal level as it enters the mixer, ensuring that the input signal is strong enough to produce optimal sound quality.
Channel Gain This control adjusts the signal level for each channel, allowing you to bring individual instruments or vocals up or down in the mix.
Master Gain This control adjusts the overall sound level of the mix, allowing you to adjust the final output to the desired volume.

By adjusting these gain controls, you can adjust the individual sound levels of each channel, ensuring that the mix is balanced and that each instrument or vocal is heard at the right volume.

audio mixer gain settings

Note: It’s important to avoid overloading the gain controls, as this can cause distortion or unwanted noise in the mix. Always aim for the optimal sound level without going overboard.

Audio Mixer Gain Explained for Beginners

As a beginner in audio production, the concept of gain in an audio mixer can be overwhelming. Simply put, gain is the amount of amplification applied to an audio signal, allowing a microphone or other input source to be heard at the desired level.

Gain is an essential component of achieving optimal sound quality in your audio production. Without proper gain settings, your audio can sound distorted, too quiet, or too loud, affecting the overall quality of your project.

To adjust the gain in an audio mixer, simply locate the gain control knob for the channel or input source you want to adjust. By turning the knob clockwise, you increase the level of amplification, while turning it counterclockwise decreases it. It’s important to be careful not to turn the gain up too high, as this can lead to audio distortion.

When adjusting gain, it’s important to keep an ear out for any distortion or clipping. If you hear distortion, simply turn down the gain until the sound becomes clear and free of distortion.

It’s also crucial to pay attention to the level of the gain, as too little gain can result in a weak and quiet audio signal, while too much can result in distortion and clipping. Proper gain levels can be achieved by using a combination of preamp gain, channel gain, and master gain settings, as well as proper microphone placement and sound check before recording.

Remember, gain is a vital tool in achieving optimal sound quality in your audio production. By properly setting the gain in your audio mixer, you can ensure that your audio sounds clear, balanced, and professional.

Audio Mixer Gain Explained for Beginners

Conclusion

In conclusion, setting the gain in an audio mixer is a crucial step in achieving optimal sound quality for your audio production. As I have discussed throughout this article, gain refers to the input level of a signal, and adjusting it properly can prevent distortion, noise, and other unwanted artifacts.

Understanding the concept of gain, the various gain controls available in an audio mixer, and how to adjust them correctly can make a significant difference in the overall sound quality of your audio production. Whether you are a beginner or an experienced audio engineer, taking the time to properly set the gain in your audio mixer is a vital step in producing professional-sounding audio.

Remember, it’s essential to exercise caution when adjusting the gain, especially when using high-gain settings. Always monitor your audio levels and use your ears to detect any unwanted distortion or noise.

By following the guidelines and tips provided in this article, you can achieve the best possible sound quality for your audio production and take your audio mixing skills to the next level.

FAQ:

Q: What is gain in an audio mixer?

A: Gain in an audio mixer refers to the amplification of an audio signal. It controls the volume level of the incoming sound, allowing you to increase or decrease the signal’s intensity.

Q: How do I set the gain in an audio mixer correctly?

A: To set the gain in an audio mixer correctly, start by setting the gain control to its minimum or zero position. Gradually increase the gain while monitoring the audio signal for distortion or clipping. Aim to find the optimal balance where the sound is clear and without any distortion.

Q: Why is gain important in an audio mixer?

A: Setting the gain properly in an audio mixer is crucial because it affects the overall sound quality and prevents audio distortion. It allows you to control the input levels of different audio sources and adjust them to an appropriate level for optimal audio production.

Q: What are the different types of gain controls in an audio mixer?

A: Audio mixers typically have various types of gain controls, including preamp gain, channel gain, and master gain. Each serves a specific purpose in controlling the input levels and shaping the final audio output.

Q: How do I adjust gain in an audio mixer?

A: To adjust gain in an audio mixer, locate the gain control for the desired audio source. Increase or decrease the gain level accordingly, while carefully monitoring the audio output. Make adjustments until the desired volume and audio quality are achieved.

Q: What are the different gain settings in an audio mixer?

A: There are several gain settings in an audio mixer, such as preamp gain, channel gain, and master gain. Preamp gain adjusts the initial input signal level, channel gain controls the level of individual audio channels, and master gain adjusts the overall output level of the audio mixer.

Q: How can I understand gain in an audio mixer as a beginner?

A: Gain in an audio mixer can be understood as the control that determines how loud or soft the audio signal is. As a beginner, it’s important to start with conservative gain settings and gradually increase them while monitoring the audio output for any distortions or clipping.

Wave Shapes & Waveforms: Sine, Sawtooth, Square & Triangle

0

When it comes to describing sounds, it is common to refer to different types of wave shapes and waveforms. These two terms are often used interchangeably and common wave shapes include sine waves, sawtooth waves, square waves and triangle waves.

The wave shape describes the physical appearance of the wave form when plotted out on a graph. Each of these have their characteristic and distinctive sound.

Wave Shapes & Waveforms

Sine Wave

Wave Shapes & Waveforms Sine Wave

(Listen at a lower volume to protect your hearing)

Let’s start with the simplest wave shape – that of the sine wave.

The sine wave is made up of a smooth curve throughout the wave cycle. The energy of the wave rises continuously till it reaches its crest before falling to its trough and then eventually returning to tge center line.

A sine wave is also known as a pure tone and it is the easiest to identify as it sounds like a flute.

In the harmonic series, the fundamental frequency, second, third, fourth, fifth harmonics and so on, are all made up of sine waves. These simple sine waves combine together with different amplitudes to create more complex waveforms like sawtooth waves, square waves and triangle waves.

Triangle Wave

Triangle Wave

(Listen at a lower volume to protect your hearing)

The triangle wave gets its name from the shape of its waveform.

Triangle waves have a brighter sound compared to sine wave. Shape-wise, it looks like an angular-version of sine wave with the amplitude of the wave rising before sharply falling. The rise and fall of the amplitude is symmetrical This results in a sound that has some of the characteristics of a sine wave but with an edgier sound.

The sound of a recorder being played breathily produces a waveform similar to a triangle wave.

Sawtooth Wave

Sawtooth Wave

(Listen at a lower volume to protect your hearing)

The sawtooth wave is named because it looks more jagged and is skewed to one side – just like the teeth on the blade of a saw.

This sound of a sawtooth wave is edgy, buzzy and almost distorted. This is a reflection of the richer harmonic content of this type of wave.

Examples of instruments that produce sawtooth waves are brass instruments like trumpets and stringed instruments being bowed.

When a violin is bowed, the sound is generated when the bow “catches” the string by friction, pulls it a distance before releasing it. This action takes place repeatedly as the bow is dragged across the string, giving the violin a slightly buzzing sound.

Square Wave

Square Wave

(Listen at a lower volume to protect your hearing)

A square wave is created by combining the odd harmonics, in other words, the 1st, 3rd, 5th, 7th harmonics and so on, in a specific proportion. This creates a shape that resembles a square. It has quite a harsh and edgy tone.

The sound of a square wave is similar to that of a clarinet. It also sounds like 8-bit computer music from the past.

What Are Harmonics & Overtones?

0

When it comes to sound, you may be wondering what are harmonics and overtones and why are they even important?

When someone you know calls you up on the phone, are you able to tell who the person is? You are likely to because – in layman’s terms – you can recognise the person’s voice. There is something unique that makes a person’s voice sound like his or her voice.

Harmonics and Overtones Give a Sound its Character

Harmonics Give a Sound its Character

In terms of sound theory, it is the harmonics that give his or her voice its unique characteristic. This is also true for other sounds.

Without the harmonics and overtones, every sound would be a simple sine wave.

Harmonics and overtones add sonic characters to a sound, whether it be a voice or an instrument.

Let’s take a closer look at what exactly harmonics and overtones are.

When you hear the piano place a note like middle C, what you are actually hearing are many different notes ringing out together at the same time. All these notes combine to create the sound that we characteristically know as that of a piano.

These different notes are called harmonics.

Fundamental Frequency and Harmonics

Harmonics and Overtones Give a Sound its Character

One of these notes is the loudest. This is called the fundamental wave or fundamental frequency. This is the main note that we will associate with the sound.

For example, when middle C is played on a piano, the fundamental frequency is 261 Hz, which is the frequency of the middle C note.

The rest of the notes are softer than the fundamental frequency and pile on top of the fundamental frequency to create the sound of a piano. This is how our ears can distinguish between a C with frequency of 261 Hz played on a piano versus a C of 261 Hz played on a guitar.

There are different factors that affect how the harmonics are created. These include factors such as the size of the instrument, the materials used, how the note is struck and so on.

Calculating the Harmonic Series

Nonetheless, these harmonics follow the laws of physics and can be calculated. They are multiples of the fundamental frequency.

For example, if you were to play the note A which vibrates at the frequency of 440 Hz, the harmonics can be calculated by multiplying 440 by 1, 2, 3, 4, 5, and so on.

Here is a worked example.

440 Hz x 1 = 440 Hz, First harmonic, or better known as the fundamental frequency.

440 Hz x 2 = 880 Hz, Second harmonic

440 Hz x 3 = 1,320 Hz, Third harmonic

440 Hz x 4 = 1,760 Hz, Fourth harmonic

440 Hz x 5 = 2,200 Hz, Fifth harmonic

440 Hz x 6 = 2,640 Hz, Sixth harmonic

440 Hz x 7 = 3,080 Hz, Seventh harmonic

440 Hz x 8 = 3,520 Hz, Eighth harmonic

and so on …

Normally, you would calculate the harmonic series up to 20,000 Hz, which is the limit of the human hearing range.

As the different harmonics combine together, both constructive and destructive interference takes place. This results in the summing and cancelling, giving the combined wave a particular characteristic shape.

The waveform created by each instrument or sound source is what allows our ears to distinguish one sound from another.

Overtones are similar to harmonics and within the musical context, the term is often used interchangeably even though there are some differences.

Next, you might want to learn more about different types of wave shapes and waveforms.

What Is A Sound System?

0

Audio engineers work with sound systems. But what exactly are sound systems? Is the sound system the same as the arrays of buttons and knobs found on in front of the audio engineer at a mixing desk? Or is it the speakers?

The Purpose of a Sound System

Let’s start at the beginning.

The purpose of a sound system is to reproduce a sound source.

In a live performance setting, sounds originate from a sound source. This is normally acoustic in nature.

Examples of sound sources include the human voice, a guitar string being plucked or a drum being struck. These sound sources produce sound waves that travel through the air to reach the listeners ears.

This is all well and good when you just have a few listeners who can hear the waves directly from the source. However, what happens when there are many people and they are all clamouring to hear the sound source?

One option would be for the sound source to increase its amplitude. This could mean that a person talking needs to raise his or her voice. Or the guitarist needs to strum even harder to get the strings to vibrate at a larger amplitude.

However, even then, this eventually reaches a limit.

That’s where a sound system comes in.

The purpose of a sound system, in a live sound context, is to reproduce and amplify the sound source or sources.

It takes acoustic sound waves, converts it into electrical signals that can then be amplified, before converting them back into acoustic sound waves to reach the ears of listeners.

Parts of a Sound System

Any sound system, no matter how simple or complex, can be broken up into three sections.

Input Section

The input section is where the acoustic sound get captured and gets converted into electrical signals. This is most commonly done with a microphone.

A microphone picks up the incoming sound waves and converts them into an electrical signal. This electrical signal gets sent to the next section of the sound system.

Mixing Section

What is a sound system - Mixing Section

The mixing section of a sound system is where the incoming electrical signals can be adjusted, processed and combined.

If the incoming electrical sound signal is too weak, it can be adjusted by raising up its level.

The signal can also be processed. For example, using an equalizer, you can boost or cut certain frequencies that are present in the signal.

Lastly, the mixing section is where you can combine different incoming signals and send them to different outputs where they are required.

Output Section

The output section is where electrical signals get converted back into acoustic sound waves.

But before it can do so, the electrical signals need to be amplified. This basically entails stepping up the power voltage of the signal so that it is more powerful than before. This is done using a power amplifier, a piece of equipment that steps up the voltage of the signal.

Once the signal has been amplified, it is then sent to the loudspeakers, where it is converted from electrical signals back into acoustic sound waves.

Signal Flow Through the Sound System

This is how sound journeys through a sound system. It first gets captured at the input section, then it is sent to the mixing section before finally being converted back to sound waves.

This is the signal flow through a sound system.

Sound System Model

A simple sound system may just have one piece of equipment at the input section and then it could pass on to the mixer, through an amplifier and out from one loudspeaker.

Signal Flow Through the Sound System

In larger, more complex sound systems, there could be tens of microphones on a stage. All the inputs from these microphones could then be sent to a mixing desk some where in the middle of a hall where all the inputs are mixed together and processed. Then the mixed signal could then be sent out to a rack of power amplifiers and to a stack of loudspeakers hanging from the ceiling at the side of the stage.

Nonetheless, whether it is a simple one-microphone system or a complex concert setup, both of these sound systems can be broken up and understood using the same input, mixing and output model.

Pink Noise Ear Training For Sound Engineers: 16 kHz, 18 dB Cut

As a sound engineer, the most important skill that you can have to is have good ears. This means training your ears to be able to identify what you are hearing. Once you are well versed in listening out to different frequencies, you will be able to create the perfect audio experience for your audience.


Pink Noise Ear Training for Sound Engineers: 16 kHz, 18 dB Cut

Anyone can train their ears to listen and identify different frequencies.

The Pink Noise Ear Training Video below will train you to identify different frequencies..

The video makes use of Pink Noise. Pink Noise is a type of randomized sound. Compared to White Noise, Pink Noise has more energy at the lower frequencies and replicates how the human ear hears sound.

This Pink Noise Ear Training Video alternates between Pink Noise and 18 dB cut at 16 kHz. Use it to learn to identify the 16 kHz frequency.

For best results, listen using headphones.

Pink Noise Ear Training For Sound Engineers: 8 kHz, 18 dB Cut

As a sound engineer, the most important skill that you can have to is have good ears. This means training your ears to be able to identify what you are hearing. Once you are well versed in listening out to different frequencies, you will be able to create the perfect audio experience for your audience.


Pink Noise Ear Training for Sound Engineers: 8 kHz, 18 dB Cut

Anyone can train their ears to listen and identify different frequencies.

The Pink Noise Ear Training Video below will train you to identify different frequencies..

The video makes use of Pink Noise. Pink Noise is a type of randomized sound. Compared to White Noise, Pink Noise has more energy at the lower frequencies and replicates how the human ear hears sound.

This Pink Noise Ear Training Video alternates between Pink Noise and 18 dB cut at 8 kHz. Use it to learn to identify the 8 kHz frequency.

For best results, listen using headphones.

Pink Noise Ear Training For Sound Engineers: 4 kHz, 18 dB Cut

As a sound engineer, the most important skill that you can have to is have good ears. This means training your ears to be able to identify what you are hearing. Once you are well versed in listening out to different frequencies, you will be able to create the perfect audio experience for your audience.


Pink Noise Ear Training for Sound Engineers: 4 kHz, 18 dB Cut

Anyone can train their ears to listen and identify different frequencies.

The Pink Noise Ear Training Video below will train you to identify different frequencies..

The video makes use of Pink Noise. Pink Noise is a type of randomized sound. Compared to White Noise, Pink Noise has more energy at the lower frequencies and replicates how the human ear hears sound.

This Pink Noise Ear Training Video alternates between Pink Noise and 18 dB cut at 4 kHz. Use it to learn to identify the 4 kHz frequency.

For best results, listen using headphones.