An audio mixer is the brains of a sound system. It is where you can control all the incoming sounds from equipment like microphones and then channel them out to the loudspeakers in order to be heard by the audience. Therefore, if you are responsible for managing sound at an event, the likelihood is that you will need to know how to use an audio mixer.
There are many different types of audio mixers but they all do the same thing. Their job is to act as a control panel for the sound operator to manage the sound.
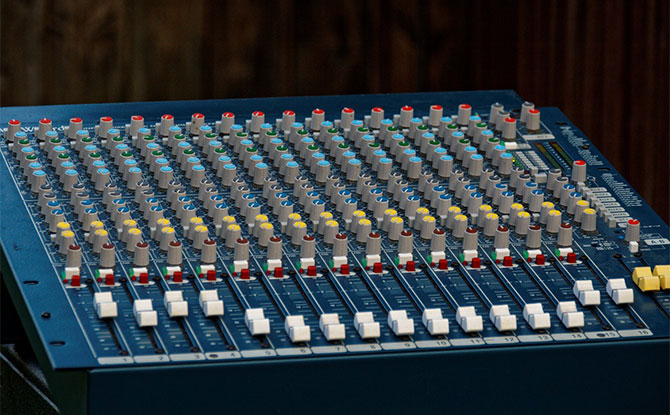
Some mixers can look as simple as the volume controls that you find on a car stereo, or they can super complex with rows and rows of knobs and faders.
In this essential guide on how to get started on an audio mixer, we are going to assume that you are new to using one and are stepping into a situation where you have to take over and manage one that has already been set up in a venue.
Overview of the Sound System
A mixer is just one part of an entire sound system. The system starts with input equipment like microphones or music players like MP3 players. These are the source of the sound.
The sound sources then get sent to the mixer where they can be adjusted or “mixed” together.
From the mixer, the sound signals then get passed on to an amplifier that boosts the signal before it is played out through the loudspeakers.
All these parts are connected by a wires known as cables.
How to Use An Audio Mixer: Switching on the Sound System
If you are making use of a venue where the sound system has already been setup (i.e. the mixer and the loudspeakers are already connected), all you have to do is to switch it on. However, there is a proper sequence for turning on the sound system and mixer to avoid damaging it.
When switching on the sound system, this is the power on sequence:
- Power on the mixer
- Power on the amplifier
When powering off the sound system, this is the power off sequence:
- Power off the amplifier
- Power off the mixer
Identify the Type of Mixer You Are Working With
There are generally two types of audio mixers – analog mixers and digital mixers.
It is quite easy to tell if you have a digital mixer on your hands – there will be large LED screen in the center of the mixer. On the other hand, analog mixers have columns of similar knobs across the main body of the mixer.
For the purpose of this essential guide to using audio mixers, we will assume that you are using an analog mixer.
Connecting Equipment to the Mixer
You will need to connect input equipment like microphones that you’d like to use to the mixer.
Microphones are connected to the mixer using cables known as XLR cables. These have a male and female end. The female end connects to the microphone and the male end connects to the mixer.
The audio mixer has multiple channels. These channels are vertical columns with a row of knobs running from the top to the bottom. These columns are known as channel strips. At the bottom of the channel strip, you will find a fader or a knob.
The part of the mixer which accepts the XLR cable can normally be found either at the top of the channel strip or at the back of the mixer, inline with the channel strip. To insert the cable, align the three pins of the XLR cable with the three holes on the mixer and plug it in.
Setting the Input Gain
Once you have connected the equipment to the mixer. You will need to control how much of the signal is allowed into the mixer. This is the purpose of the gain or trim knob. This can usually be found at the top of the channel strip, just below the input jacks.
To set the input gain, you will need to be able to monitor the amount of signal coming in to the mixer. This can be monitored using the VU (volume unit) meters of the mixer. These are the set of lights usually found on the right side of the mixer.
To activate the VU meters for a channel, you may have to press a button known as PFL. When you can speak into the microphone, you should be able to see the VU meters lighting up.
Start with the trim knob set completely to the left. Speak into the microphone (“Mic test, 1, 2, 3”) and then slowly turn the knob clockwise. You should be able to see the VU meter levels rising. Turn the knob until the level comes to the 0 mark on the VU meter.
Sending the Sound from the Mixer to the Loudspeakers
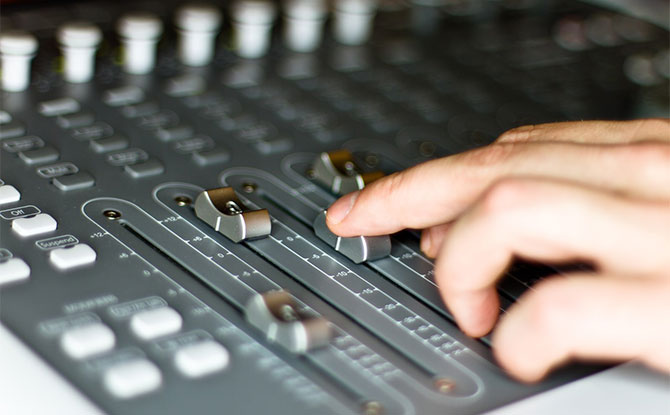
To send the sound the loudspeakers, the mixer has two set of faders that act as volume controls. The first is the master fader. This can normally be found on the right side of the mixer and controls the overall signal level that goes out of the mixer to the amplifier and loudspeakers.
The second is the channel fader. This can be found at the bottom of the channel strip. This controls the volume of each individual channel being sent out of the mixer. Each channel has its own fader to allow you to adjust how loud individual inputs are in relation to each other.
First, raise the master fader to the 0 level.
Next, raise the channel fader to the desired volume.
If you find that the channel fader can only be raised a little bit before the sound through the loudspeaker is too loud, lower the master fader and raise the channel fader.
If you find that you have to raise the channel fader so high that it is near the top of the fader run, you may then need to raise the master fader.
Ideally, the channel fader should be around the 0 mark. This will allow for sufficient room to raise the volume, if necessary.